
How to Knit an Elf
Complete Size – 15cm width x 26cm height
What you will need…
Total time – 3 Hours 45 Minutes Each Knitted Elf
3.25mm knitting needles (UK 10, US 3)
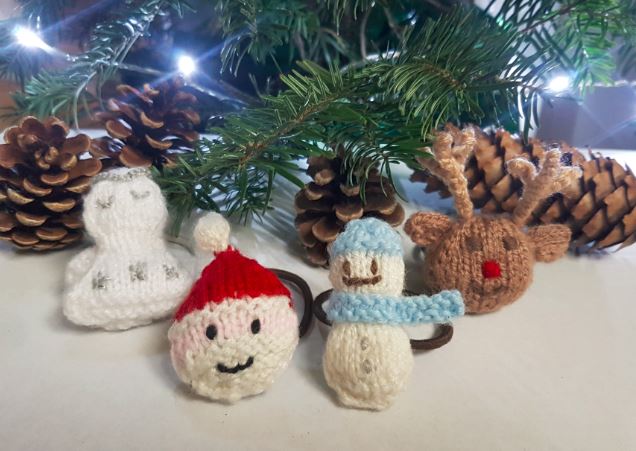
Double knitting yarn – Colours according to preference. The pictured elf requires red, white, and cream, with very small amounts of blue and medium brown.
Sewing up needle
Selection of coloured pins for marking out facial features
Scissors
Toy filling/stuffing

Before You Start…
Abbreviations
K = Knit P = Purl St = Stitch Sts = Stitches
Cast On – I use the thumb method
St-st = stocking stitch. Alternating a row of knit stitches (right side), with a row of purl stitches (wrong side).
K2tog = Decrease by knitting two stitches together, making one stitch from two.
Inc = Increase – by knitting into the front and the back of the same stitch, to make two stitches out of one.
Cast off – K wise or P wise according to pattern. US – bind off
B&T tightly – Using sewing up needle, thread yarn through all remaining stitches.

TOP TIPS
Your elf can be made different colours, such as red or green. Face colour can also be amended to preference, but I would note that a darker tone may work better so as to not blend in with the white of the hat. If short on time, work straight from the body piece into the head piece, and just before you start decreasing rows for the head, consider continuing this head piece straight into the hat piece. This combination will create a single legs/body/head/hat piece (see Make it Different below).

How to Make it…
Made from a joined knitted leg and body piece, one knitted head piece, one knitted hat piece, two knitted arm pieces, two knitted ear pieces, and one knitted neck frill piece. All pieces are sewn together, with added stitching for the hair and facial features.
Leg & Body Piece

Make 1 for each knitted elf
Time – Total 55 Minutes (20 Minutes for each leg, 15 Minutes for the body part)
Piece Size – 10 cm (width) x 15 cm (height)
Needles 3.25 mm
Yarn As per preference (red as shown)
Begin at the base of the first leg, and cast on 4sts
*P 1 row
Inc Kwise into every st (8sts)
Beginning with a P row, st-st 25 rows**
Break off yarn and leave this first leg remaining on the knitting needle, and cast on 4sts onto the other knitting needle.
Continue to work from * to ** to work the second leg.
Next row, continue K along the length of this second leg and continue to knit across the top part of the first leg to join both leg pieces together (16sts)
Continue to work up the body, beginning with a P row, st-st 17 rows.
Next row K2tog to end (8sts)
P 1 row***
K2tog to end (4sts)
B&t tightly
Head Piece

Make 1 for each knitted elf
Time – 25 Minutes each piece
Piece Size – 10 cm (width) x 6 cm (height)
Needles 3.25 mm
Yarn As per preference (cream shown)
Begin at the bottom, neck side, of the head
Using cream, or colour as required for the head, cast on 4sts
P 1 row
Inc Kwise into every st (8sts)
P 1 row
Inc Kwise into every st (16sts)
P 1 row
Next row (Inc Kwise, K1) to end (24sts)
Beginning with a P row, st-st 9 rows
Next row (K2tog, K1) to end (16sts)
P 1 row
Next row K2tog to end (8sts)
P 1 row
Next row K2tog to end (4sts)
B&t tightly
Hat Piece

Make 1 for each knitted elf
Time – 25 Minutes each piece
Piece Size – 12 cm (width) x 7 cm (height)
Needles 3.25 mm
Yarn As per preference (white and red shown)
Begin at the bottom rim of hat, and using white, cast on 26sts
Beginning with a P row, st-st 3 rows.
Break off yarn and join on red, or colour required for the main hat.
K6, K2tog, K10, K2tog, K6 (24sts)
P 1 row
K5, K2tog, K10, K2tog, K5 (22sts)
P 1 row
K5, K2tog, K8, K2tog, K5 (20sts)
P1 row
K4, K2tog, K8, K2tog, K4 (18sts)
P 1 row
K4, K2tog, K6, K2tog, K4 (16sts)
P1 row
K3, K2tog, K6, K2tog, K3 (14sts)
P1 row
K3, K2tog, K4, K2tog, K3 (12sts)
P 1 row
(K2tog, K1) 4 times (8sts)
P 1 row
Next row K2tog to end (4 sts)
B&t tightly
Ear Pieces

Make 2 for each knitted elf
Time – 5 Minutes each piece
Piece Size – 2 cm (width) x 2 cm (height)
Needles 3.25 mm
Yarn As per preference (cream shown)
Begin at the bottom of the ear
Using the same colour as used for the face piece, cast on 5sts
Beginning with a P row st-st 3 rows
K2tog, K1, K2tog (3sts)
B&t tightly
Neck Frill Piece

Make 1
Time – 20 Minutes each piece
Piece Size 4 cm width x 4 cm height
Needles 3.25 mm
Yarn White
Begin at the centre of the neck piece, and initially work outwards
Using white, cast on 4sts
P 1 row
Next row Inc Kwise into every st (8sts)
P 1 row
Inc Kwise into every st (16sts)
P 1 row
Next row (K2, inc Kwise) Five times, K1 (21sts)
P 1 row
Next row K2, (Yrn, K2tog) 9 times, K1
P 1 row
K1, (K2tog, K2) 5 times (16sts)
P 1 row
Next row K2tog to end (8sts)
P 1 row
Next row K2tog to end (4sts)
Cast off
Arm Piece

Make 2
Time – 15 Minutes each piece
Piece Size 4 cm width x 7 cm height
Needles 3.25 mm
Yarn White and Red
Begin at the hand part of the arm piece
Using white, cast on 4sts
P 1 row
Inc Kwise into every st (8sts)
Beginning with a P row, st-st 3 rows
Break off yarn and join on red
Beginning with a K row, st-st 16 rows
Cast off
Piece it Together…
Sewing-up time – Approximately 60 Minutes

Sewing up Leg & Body Piece – With the right side of st-st on the outside, work from the tip of the legs first. From the tip of one of the legs, gather together cast-on sts and use mattress stitch to oversew the row ends towards the top of the leg, where it becomes the body piece. Repeat with the other leg. At this point, stuff each leg lightly, using your little finger to push downwards. Continue to then oversew row ends towards the B&t end of the body. Just before reaching the end, stuff lightly, before tightening up the B&t end fully, and then fastening off all loose ends.

Making up the Neck Collar – With the right side of st-st on the outside, fold neck collar piece in half, bringing the cast-off and cast-on stitches together. This forms the centre-point of the collar. Over-sew row ends together, working from this centre, towards the outer edge, where the folded ‘yrn’ stitching forms a nice frill edge. Push gently into the centre of the completed neck frill to form a gentle concave shape. Place on to the top of the completed leg/body piece, and sew into place. Fasten off the loose ends.
Making up the Arms – With the right side of st-st on the outside, work from the tip of the arm. Gather together cast-on sts and use mattress stitch to oversew the row ends towards the cast-off edge. Stuff lightly through the open end, using your little finger to push downwards. With the cast-off edge open, sew it onto the side of the body, just below the neck collar. Repeat with the other arm, attaching this arm to the opposite side of the body. Fasten off loose ends.

Making up the Head – It is easier to sew on the hair and facial features of the elf onto the head piece before sewing it up. This allows easier placement and easier fastening off the loose ends on the wrong side of st-st. Using coloured pins can help with placement, marking out the location of each of the facial features, and the number of stitches in between them. Start with the hair and find or mark the centre point of the face, either two rows below the decreasing rows of the head, or just below the white rim of the hat if you have made the combine head/hat section (this option has been shown in the pictures). Place one pin, 1 knitted stitch to the right of this point. The second hair pin is placed 1 row down and 4 stitches the left of this first pin. The third hair pin is applied 1 row down and 2 knitted stitches to the right, of the first pin. Now mark the positioning of the eyes, counting down 1 row below the lower hair points, 1 stitch either side of the imaginary centre line, i.e. eyes are 2 clear knitted stitches apart. The mouth is then marked two clear rows below each of the eye pins, with pins marking the edges of the mouth.

Once happy with pinned positioning, use coloured yarn, brown for the hair, blue for the eyes and red for the mouth, to complete the sewn features. Note that the hair is made from 4 long loops each side, and that the mouth is made from two smaller stitches, each coming from the pinned outer edge of the mouth, and comes down 1 row as it crosses 1 knitted stitch towards the centre line. Fasten off loose ends on the wrong side of st-st, keeping ends very short so that they are less likely to show through the surface at the front. Proceed to then sew up the head, with the right side of st-st on the outside. Gather up cast-on sts and use mattress stitch to oversew the row ends towards the cast-off edge. Place head on top of the neck piece and completed leg/body part of the elf, ensuring it is facing the right direction with the body seam at the back, and sew into place. Ensure all pins are removed when complete and all loose ends fastened off.

Making up the Ears – With right side of st-st on the outside, fold an ear piece in half, across the cast on edge. With the right side of st-st on the outside, oversew this cast-on edge, and use mattress stitch to oversew the row ends, working towards the B&t top tip of the ear. Pull this up tightly and fasten off, which should leave a pointed tip to the ear. No stuffing is required. Pin into place onto one side of the head, about level with the eyes, and sew into place. Fasten off loose ends and once again ensure all pins are removed.

Making up the Hat – With the right side of st-st on the outside, work from the bottom rim of the hat. Use mattress stitch to oversew the row ends, working towards the B&t top tip of the hat. Stuff lightly through the bottom open end of the hat. Pin into place onto the top of the head, and sew into place. Fasten off loose ends.
Make it Different…
If short on time, consider making a single leg/body/head piece or leg/body/head/hat piece, depending on your preference. The former will keep the separate hat, but the latter is certainly a lot quicker. To do this, work straight from the body piece into the head piece, and at the point at which it says *** break off yarn and join on beige or colour as required for the head. When continuing from the head to the top of the hat, you need to change yarn just before you start decreasing rows for the head. At the point of **** break off yarn and join on white for the hat rim, then continue as per the hat pattern. As when making up the separate pieces, consider adding the facial features first so as to fasten and hide loose ends more easily. This single legs/body/head/hat piece is sewn up in a similar way to the separate pieces, but remember the neck collar would have to be placed around the neck before sewing across row ends so as to sew it together while it is in position.

Now that your elf is complete you may go and find that twinkle of magic to allow him to roam around as he pleases…! Hope he provides some great entertainment in your homes, or for those to whom he is given as a nice knitted Christmas gift.


Behind the Scenes!
These patterns are all made up as I go along, learning from mistakes along the way. Every time I create a new pattern, I record it in the Updates part of this site (effectively my blog…) There is a story behind each creation, and this can help give you some more ideas and encouragement. See the Update info….
All done?
Feel free to share your successes or any other tips or suggestions by contacting me. If it’s all gone swimmingly and you’re ready for your next challenge, have a look at what to try next! My next pattern!