How to Knit a Little Santa
Complete Size - 4cm width x 7cm height
What you will need...
Total time - 1 Hour 10 Minutes Each Knitted Santa
3.25mm knitting needles (UK 10, US 3)
Double knitting yarn - White, red, pink, and black
Sewing up needle
Scissors
A small amount of toy filling/stuffing
Optional pin badge or plain hairband to sew onto the back of your knitted Santa

Before You Start...
Abbreviations
K = Knit P = Purl St = Stitch Sts = Stitches
Cast On - I use the thumb method.
St-st = stocking stitch. Alternating a row of knit stitches (right side), with a row of purl stitches (wrong side).
K2tog = Decrease by knitting two stitches together, making one stitch from two.
P2tog = Decrease by purling two stitches together, making one stitch from two.
Inc = Increase - by knitting into the front and the back of the same stitch, to make two stitches out of one.
Cast off - K wise or P wise according to pattern. US - bind off.
B&t tightly - Break off yarn and thread yarn through the remaining stitches on needle, pull up tightly and fasten off.
TOP TIP
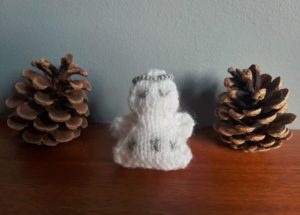
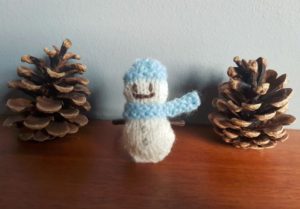
Sew up and add stitching in the suggested order to allow a neater finish when fastening off loose ends. And add to the collection with a knitted angel, knitted reindeer and knitted snowman!

How to Make it...
Made from two separate knitted head pieces. Pieces are sewn together with added stitching for facial features. Optional pin badge, hairband or finger-knitted loop to be sewn on your finished piece, to allow it to be used as an accessory.
Front Head Piece

Make 1
Time - 20 Minutes
Piece Size 4 cm x 7 cm
Needles 3.25 mm
Yarns White, Pink, Red
Beginning with the beard and using white yarn, cast on 5sts
K1, Inc Kwise, K1, inc Kwise, K1 (7sts)
P 1 row
K1, Inc Kwise, K1, inc Kwise, K1, inc Kwise, K1 (10sts)
P 1 row
K1, Inc Kwise, K6, Inc Kwise, K1 (12sts)
Break off yarn and join on pink
Beginning with a K row st-st 2 rows
Break off yarn and join on white
K1, K2tog, K6, K2tog, K1 (10sts)
K 1 row
Break off yarn and join on red
Beginning with a K row st-st 2 rows
st-st 6 further rows, decreasing 1 st at the start of every row, by either K2tog or P2tog depending on whether it is a K row or P row respectively (4sts)
K2tog twice
P 1 row
Break off yarn and join on white
Inc Kwise into both sts (4sts)
P1 row
Inc Kwise into every st (8sts)
P1 row
K2tog to end (4sts)
B&t tightly
Rear Head Piece

Make 1
Time - 15 Minutes Each
Piece Size 4 cm x 6 cm
Needles 3.25 mm
Yarns White, Red
Beginning with the hair and using white yarn, cast on 5sts
K1, Inc Kwise, K1, inc Kwise, K1 (7sts)
P 1 row
K1, Inc Kwise, K1, inc Kwise, K1, inc Kwise, K1 (10sts)
P 1 row
K1, Inc Kwise, K6, Inc Kwise, K1 (12sts)
Beginning with a P row st-st 2 rows
K1, K2tog, K6, K2tog, K1 (10sts)
K 1 row
Break off yarn and join on red
Beginning with a K row st-st 2 rows
st-st 6 further rows, decreasing 1 st at the start of every row, by either K2tog or P2tog depending on whether it is a K row or P row respectively (4sts)
K2tog twice
P2tog and fasten off
Piece it Together...
Stitching of facial features- Total of 15 Minutes
Sewing-up time - Total of 20 Minutes

Facial Features
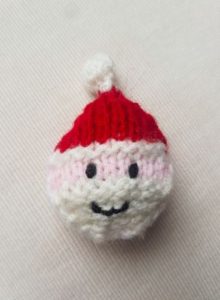
Using dark brown yarn, stitch two eyes onto the front santa main piece, within the small pink section. Continue to sew a small mouth onto the upper part of santa's beard, as shown in the picture.


Sewing Up
With right side of st-st on the outside, begin at the bobble at the top of the hat. Pull up tightly and oversew rows ends, leaving a gap at the base. Poke in a small amount of stuffing to form bobble shape. Continue to sew across row ends of the rest of the hat, face and beard, leaving cast-on edges open. Stuff the rest of the santa firmly and close the gap in the seam.
Either fasten off all loose ends, or leave a length to be able to sew on the hairband or pin badge if desired.


Making a Hairband
Sew the hairband so it lies horizontally across the back of the santa. This will allow the santa to rest in the upright position in the hair.
Oversew several times to give it strength and longevity.

Make it Different...
This little Santa makes a lovely addition to turn many things Christmassy. Due to the small size, it is great for putting in the hair, or to hang from a drawer, handle or window. Especially good for a handmade Christmas tree decoration!
There is also the option of knitting a Santa using just the single front main piece. This main piece may then be sewn onto something else, such as a stocking or cushion. Using the same pattern with larger needles, will make it slightly larger without adding any extra time.
Have a go at amending the pattern slightly to make this into a little elf. Instead of having the purl as the right side for the beard - flip the pattern to have the traditional st-st with the K-side being the right for this part also, to make a smooth face. Choose green for the main hat colour and there you have the basics for an elf. Experiment with some different facial features to make him a little bit cheeky!
Complete the collection by adding in a knitted snowman, knitted reindeer or knitted angel!

Behind the Scenes!
These patterns are all made up as I go along, learning from mistakes along the way. Every time I create a new pattern, I record it in the Updates part of this site (effectively my blog…) There is a story behind each creation, and this can help give you some more ideas and encouragement.
All done?
Feel free to share your successes or any other tips or suggestions by contacting me. If it's all gone swimmingly and you're ready for your next challenge, have a look at what to try next!


