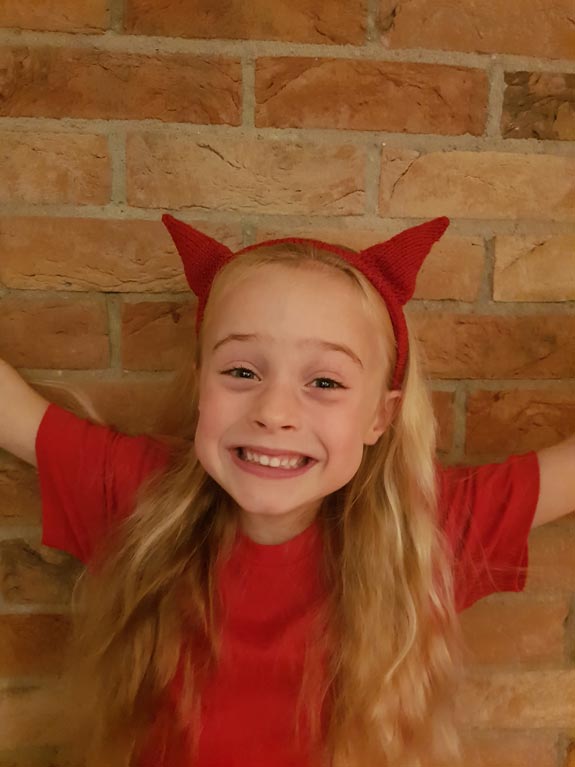
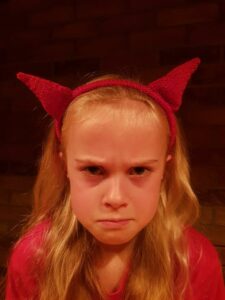
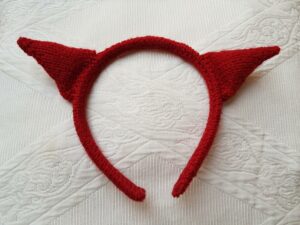
How to Knit a Halloween Horn Headband
Complete Size – 22cm width x 14cm height
Complete Size Headband Only – 13cm width x 14cm height
What you will need…
Total time – 2 Hours 15 Minutes Completed Knitted Horn Headband
Total time – 1 Hour Completed Knitted Headband Only
3.25mm knitting needles (UK 10, US 3)
Double knitting yarn – Red
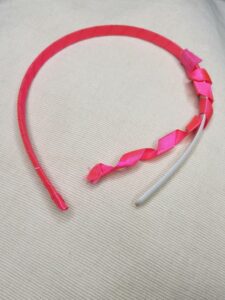
An old standard headband to reuse (or new one if not available)
Sewing up needle
Scissors
A small amount of toy filling/stuffing (for the individual knitted horn parts only).
Before You Start…
Abbreviations
K = Knit P = Purl St = Stitch Sts = Stitches
Cast On – I use the thumb method.
St-st = stocking stitch. Alternating a row of knit stitches (right side), with a row of purl stitches (wrong side).
K2tog = Decrease by knitting two stitches together, making one stitch from two.
P2tog = Decrease by purling two stitches together, making one stitch from two.
Cast off – K wise or P wise according to pattern. US – bind off.
TOP TIPS
If you have any old different-sized headbands, no worries, the pattern can be adjusted to make a piece that will fit.
Alternatively, save a good chunk of time by using an old (or new!) plain red headband and simply sew the horns directly to it. This means part of the pattern – the knitted headband cover piece – will not need to be made. Although it won’t look as quite a good a finish, if out trick or treating I’m sure nobody will look that closely… And the whole thing can also then be whipped up in about 1 Hour 15 Minutes – much quicker for those last-minute costumes!
Perhaps use the pattern for the headband piece only to make a plain knitted headband – great to match school uniforms!
How to Make it…
Made from two knitted horn pieces, and one knitted headband piece. All pieces are sewn together around, and on top of, preferably an old headband to give it a new lease of life! Alternatively, use the pattern for the headband piece only to make a plain knitted headband.
** PDF Download Now Available! **
Add to Basket or Click on Link in Ravelry to buy now…

Benefits of PDF Downloads!
- No endless scrolling! Compact pattern can be seen more easily over a clear three-column arrangement.
- Standard easy-read font (large print option available on request.)
- Download your favourites – Add them to your own personal folder to locate quickly and easily.
- Avoid any internet connection issues – download and knit wherever you like!
Printer-friendly Easy Print…
- No screen glare or eye strain.
- Mark where you get up to, to more easily carry on from where you left off.
- Colourful front page with pictured finished item, then black and white text-only – be kind to our planet, only print the pages you need!
Devil Horn Headband Knitting Pattern PDF Download
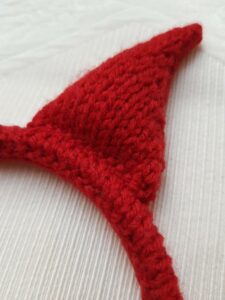
Horn Piece
Make 2 for each Knitted Horn Headband
Time – 30 Minutes each Piece
Piece Size – 9 cm (width) x 6.5 cm (height)
Needles 3.25 mm
Yarn Red
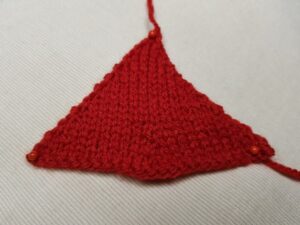
Begin at bottom of horn and cast on 25sts
Beginning with a K row st-st 2 rows (Rows 1 & 2)
Row 3 – K2tog, K10, K2tog, K9, K2tog (22sts)
Row 4 – This and every following alternate row P
Row 5 – K2tog, K8, K2tog, K8, K2tog (19sts)
Row 7 – K2tog, K6, K2tog, K7, K2tog (16sts)
Row 9 – K2tog, K12, K2tog (14sts)
Row 11 – K2tog, K10, K2tog (12sts)
Row 13 – K2tog, K8, K2tog (10sts)
Row 15 – K2tog, K6, K2tog (8sts)
Row 17 – K2tog, K4, K2tog (6sts)
Row 19 – K2tog, K2, K2tog (4sts)
Row 21 – K2tog twice
Row 22 – P2tog and fasten off
Headband Piece
Make 1 for each Knitted Horn Headband
Time – 45 Minutes each piece
Piece Size 39 cm width x 3 cm height
Needles 3.25 mm
Yarn Red
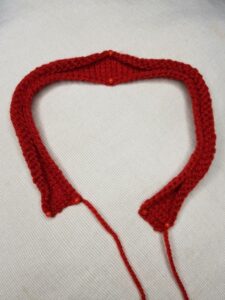
These are knitted as a single long length to fold over the old headband. This was a standard size and so sizes are approximate – please reduce number of cast-on stitches for a shorter band, and increase the number of rows for a wider headband. Try placing your knitting in progress next to your headband to test fitting/size before casting off.
Cast on 80sts
Beginning with a P row, st-st 6 rows
Cast off Pwise
Piece it Together…
Sewing-up time – 20 Minutes
 Sewing up Knitted Horn Piece
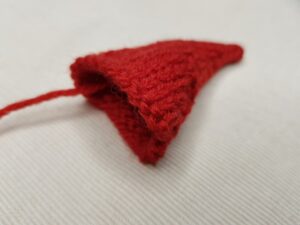
Making up the Horns – With the right side of st-st on the outside, fold the cast-on edge of the knitted horn piece in half, bringing together the two sets of row ends. Oversew these row ends from the tip of the horn down to the cast-on edge to form the horn shape, leaving the cast-on edge open. Stuff with toy filling/stuffing to fill out the horn shape, then oversew this cast-on edge. Complete this process with the other knitted horn to have two completed horns.
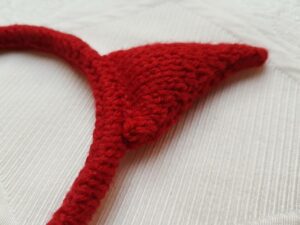
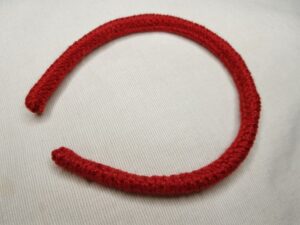
 Sewing Knitted Headband Piece
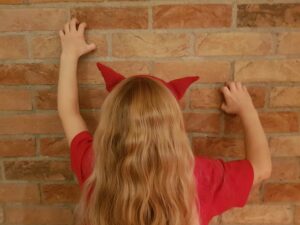
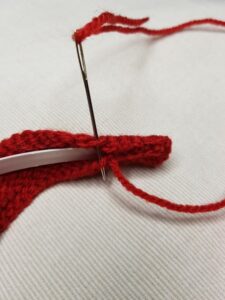
Making up the Headband – With the right side of st-st on the outside, roll the cast-off edge of the knitted headband piece over the old headband towards the cast-on edge. Oversew these rows of stitches together, along its length as shown above, around the old headband. Ensure row ends are also oversewn, so that the headband does not come out. No stuffing is required unless your piece turns out oversized or you fancy a bit of extra comfort.
Make it Different…
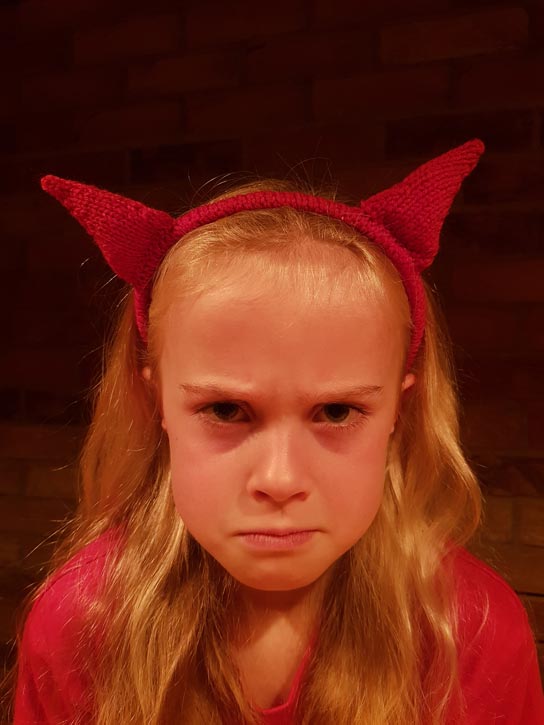
These knitted horns are great as the flexible headband inside allows it to fit all members of our household (adults as well as the kiddies!) But the pattern could be used with old headbands of all sorts of shapes and sizes by adjusting the pattern as above. Even just have a go at making just the knitted headband itself, making it up without the horns. The knitted feel is certainly more comfortable than the usual plastic. This could also include making one up using a different colour, such as plain red or green, perhaps to match a school uniform.
Although I haven’t tried it yet, I’m sure the pattern could quite easily be adjusted to make a pair of knitted cats ears/knitted fox ears – for those other fancy dress occasions requiring some quick knitted costume accessories! Simply change your yarn colour, perhaps an orange for Fantastic Mr Fox for world book day?
These Halloween knitted devil horns are the latest of a few bits of Halloween knitting on the site. You may wish to take a look at the other Halloween knitting patterns I’ve done, to help with some decorations or Halloween costumes. Children may love helping you come up with some nice designs for some knitted pumpkins, and dangling a knitted bat or a knitted spider on the end of a broomstick may further complete a witch costume. Celebrate Halloween with a knitted homemade touch!

Behind the Scenes!
These patterns are all made up as I go along, learning from mistakes along the way. Every time I create a new pattern, I record it in the Updates part of this site (effectively my blog.) There is a story behind each creation, and this can help give you some more ideas and encouragement. See the Update info….

All done?
Feel free to share your successes or any other tips or suggestions by contacting me. If it’s all gone swimmingly and you’re ready for your next challenge, have a look at what to try next! My next pattern!