

How to Knit a Pumpkin
Complete Size - 8cm width x 10cm height
What you will need...
Total time - From 2 Hours 30 Minutes Each Knitted Pumpkin (Depending on facial features, excluding chain)
3.25mm knitting needles (UK 10, US 3)
4mm knitting needles (UK 8, US 6)
Double knitting yarn - light brown, dark brown and orange.
Sewing up needle
Toy stuffing / filling
Scissors

Before You Start...
Abbreviations
K = Knit P = Purl St = Stitch Sts = Stitches
Cast On - I use the thumb method.
St-st = stocking stitch. Alternating a row of knit stitches (right side), with a row of purl stitches (wrong side).
K2tog = Decrease by knitting two stitches together, making one stitch from two.
Inc = Increase - by knitting into the front and the back of the same stitch, to make two stitches out of one.
Sl2tog - Slip two stitches together from the left needle to the right.
p2sso - pass two slipped stitches over (over the knitted stitch).
Cast off - P wise. US - bind off.
B&t tightly - Break off yarn and thread yarn through the remaining stitches on needle, pull up tightly and fasten off.
TOP TIP
Don't over-stuff your pumpkin as the stripe pattern may show through some of the white colour from the stuffing.
Get children to help design a pumpkin face, great for inspiration as well as a fun challenge for them.

How to Make it...
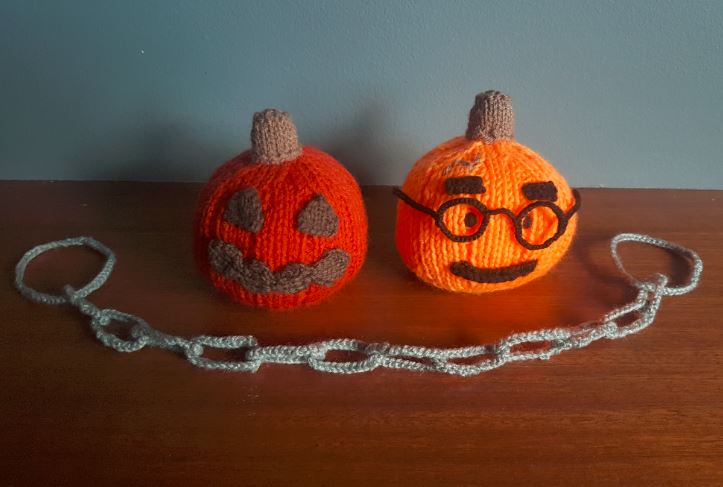
Made from a knitted pumpkin piece, a small knitted stem piece, two small knitted triangle eyes, and a further knitted piece for the mouth. All pieces are sewn together with some optional stitching or hair for an extra twist!
Pumpkin Main Piece

Make 1
Time - 1 Hour 30 Minutes
Size 9cm x 8 cm
Needles 4 mm
Yarn Orange
Cast on 4sts
P 1 row
Inc Kwise into every St (8sts)
P 1 row
Inc Kwise into every St (16sts)
P 1 row
Next row (K1, Inc Kwise) to the end (24sts)
P 1 row
Next row (K2, Inc Kwise) to the end (32sts)
P 1 row
Next row K5 (Inc Kwise, K2) 8times, K3 (40sts)
P 1 row
Next row K5 (Inc Kwise, K3) 8times, K3 (48sts)
P 1 Row
*Next row K6, P1, (K4, P1) 7 times, K6
Next row P6, K1, (P4, K1) 7 times, P6 **
Continue from * to ** 7 further times, making a total of 16 rows of this rib pattern
Next row K5 (K2tog, K3) 8times, K3 (40sts)
P 1 row
Next row K5 (K2tog, K2) 8times, K3 (32sts)
P 1 row
Next row (K2, K2tog) to the end (24sts)
P 1 row
Next row (K1, K2tog) to the end (16sts)
P 1 row
Next row K2tog to the end (8sts)
B&t tightly
Top Stem

Make 1
Time - 10 Minutes Each
Size 2cm x 2cm
Needles 3.25 mm
Yarn Light Brown
Cast on 24sts
P 1 row
Next row (K1, K2tog) to end (16sts)
P 1 row
Next row K3, K2tog, K6, K2tog, K3 (14sts)
P 1 row
Next row K2, K2tog, K5, K2tog, K3 (12sts)
Next row K to form top rim
Next row K2tog to end (6sts)
B&t tightly
Large Wavy Mouth

Make 1
Time - 15 Minutes Each
Size 8.5 cm
Needles 3.25 mm
Yarn Dark Brown
Cast on 2sts
P 1 row
*Inc Kwise into both sts (4sts)
P 1 row
Next row Inc Kwise, K2, Inc Kwise (6sts)
P 1 row
K2tog, K2, K2tog (4sts)
P 1 row
K2tog twice (2sts)
P 1 row**
Repeat from *to ** three more times
K2tog and fasten off
Triangle Eyes

Make 2
Time - 5 Minutes Each
Size 2cm x 2cm
Needles 3.25 mm
Yarn Dark Brown
Cast on 7sts
P 1 row
Continue in st-st 4 further rows dec 1 st at the start of every row, until 3sts remain (3sts)
Sl2tog, K1, p2sso
Glasses

Make 1
Time - 40 Minutes Each
Size 7 cm
Needles 3.25 mm
Yarn Dark Brown
Using a single length of dark brown yarn, finger knit the following lengths.
Two pieces of 4cm long - For arms of glasses
Two pieces of 7cm long - For Lens Rims
One pieces of 1.5cm long - For the nose bridge
Join together these pieces as shown in the picture.
Leave two lengths, one at each end of the arms, to allow fixing in place to the pumpkin face, and fasten off all other loose ends.
Thin Mouth & Eyebrows

Make 1 Mouth, 2 Eyebrows
Time - 5 Minutes Each
Size 2-6 cm x 1 cm
Needles 3.25 mm
Yarn Dark Brown
Mouth - Cast on 12sts
Cast off Pwise
Eyebrows - Cast on 5sts
Cast off Pwise
Piece it Together...
Sewing up Time 25Minutes
Options are to sew on the facial features before or after making up the main body of the pumpkin. The benefit of the former is so that loose ends may be hidden more easily, whereas the latter allows more accurate positioning.

Main Piece
With right side of stocking-stitch on the outside, oversew row ends, leaving a small gap in the seam. Mattress stitch will leave a nice neat finish.
Stuff lightly with toy filling, then close the gap in the seam.
Fasten off all loose ends.
With wrong side of stocking stitch on the inside, oversew row ends of the knitted stem piece, then turn right side out and stuff lightly.
Pin this stem piece to the top of the pumpkin and sew in place.


Facial Features
Pin each of the facial features required for your design onto the pumpkin in the desired position.
Oversew the edges of each feature to the main pumpkin piece to fix in place and remove pins.
Sew on any extra additional detailing as required such as sewn eyes or the harry potter scar stitching.
Fasten off all loose ends and ensure all pins are removed when complete.


Chains
Allow five minutes to knit and sew together each link of the chain.
Chain as shown took 1 hour 10Minutes.
Using two strands of yarn together finger knit 12 lengths of 8cm each.
Using two strands of yarn together finger knit 2 lengths of 18 cm to make the larger loops at the end.
Begin at one end sewing together a larger loop, as shown in pictures, fastening off the loose ends by weaving them into the chain at either side of the join.
Continue to work along the chain, looping each finger-knitted length through the previous link, one at a time, adding the second longer length at the end to make the larger ring.
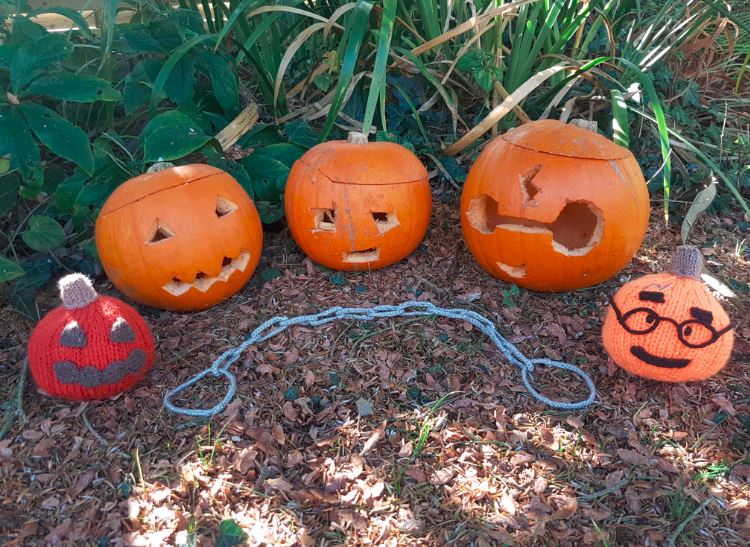
Place the completed chain around completed pumpkin or other toy to add to the Halloween theme.


Make it Different...
The designs for the face of a pumpkin are endless...
There's always the option of picking another little knitted shape to use as part of the face such as the facial features as seen on the knitted emoji-style faces, knitted hearts or other small knitted pieces from other knitting patterns - just mix and match.
Start your own little pumpkin collection - as well as different faces and accessories, there are also ghost pumpkins, and you could make a larger version by knitting the same pattern but using two strands of yarn together.
Try knitting a design for each member of the family - based on our household, might even scare the trick or treaters away!


Behind the Scenes!
These patterns are all made up as I go along, learning from mistakes along the way. Every time I create a new pattern, I record it in the Updates part of this site (effectively my blog…) There is a story behind each creation, and this can help give you some more ideas and encouragement.
All done?
Feel free to share your successes or any other tips or suggestions by contacting me. If it's all gone swimmingly and you're ready for your next challenge, have a look at what to try next!
