
How to Knit a Poppy
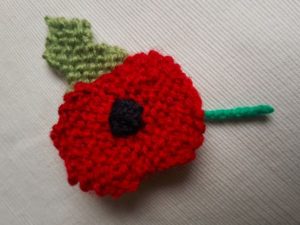
Complete Size – Traditional Knitted Poppy - 7cm width x 7cm height (including leaves)
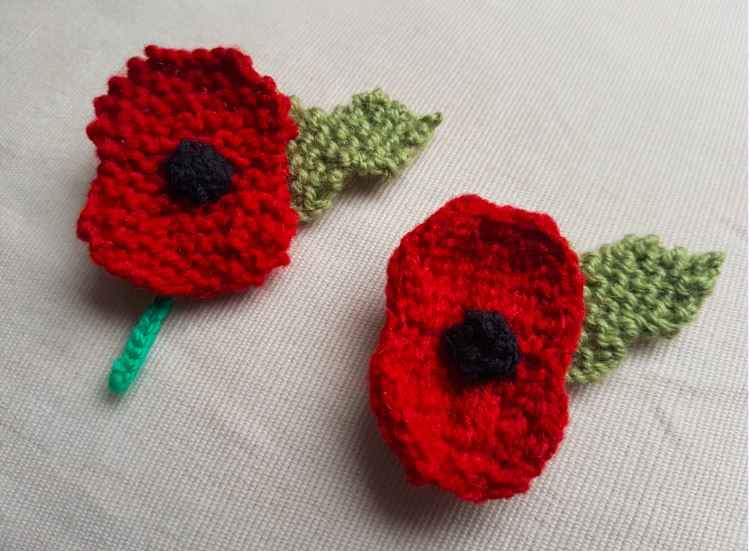
Complete Size – Wavy Edge Knitted Poppy - 6cm width x 6cm height
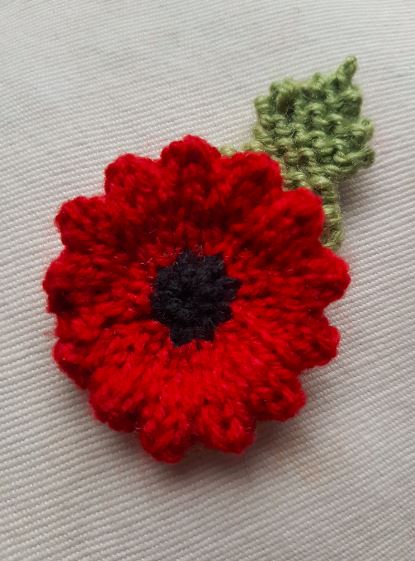
Complete Size – Floppy Knitted Poppy - 8cm width x 8cm height
What you will need...
Total time - From 1 Hour to 1 Hour 20 Minutes Each Knitted Poppy
3.25mm knitting needles (UK 10, US 3)
Double knitting yarn - red, light green, and black. Optional bright green for stem.
Sewing up needle
Scissors
Optional pin badge or plain hairband to sew onto the back of your knitted poppy.


Before You Start...
Abbreviations
K = Knit P = Purl St = Stitch Sts = Stitches
Cast On - I use the thumb method.
St-st = stocking stitch. Alternating a row of knit stitches (right side), with a row of purl stitches (wrong side).
G-st = Garter stitch. Every row knit (no purl stitches).
K2tog = Decrease by knitting two stitches together, making one stitch from two.
Inc = Increase - by knitting into the front and the back of the same stitch, to make two stitches out of one.
Yrn = 'Yarn Over' - Loop the yarn around the end of your needle (under and over) to create a new stitch.
Cast off - P wise. US - bind off.
B&t tightly - Break off yarn and thread yarn through the remaining stitches on needle, pull up tightly and fasten off.
TOP TIP
Depending on the style you would like or the amount of time you've got, have a look at the variations and mix and match.
Let us Remember - Use this pattern to raise as much money as you like for the Poppy Foundation. Try a knitathon! Knit as many as you can and as well as getting sponsorship, you could sell all of your poppies to raise some more.


How to Make it...
There are three different patterns here for the main flower - one for the Traditional Knitted Poppy based on the traditional style paper version, a different Wavy Edge Knitted Poppy, and a Floppy Poppy style.
The Traditional style poppy can be made in two different ways. Garter stitch may be used for a single piece, or stocking stitch may be used for a smoother finish. If wishing to do stocking-stitch, two main pieces should be made to place together, for a neater and more sturdy finished piece.
Made from one or more knitted main pieces, a knitted centre piece, a knitted leaf piece, and a finger-knitted stem. All pieces are sewn together, with or without a pin badge or hairband sewn at the back.
Traditional Style Main Piece

Make 1 or 2 Depending on Your choice of G-St or St-st style
Time - 20 Minutes each Piece
Size 4 cm x 5 cm
Needles 3.25 mm
Yarn Red
Quickest, simplest garter-stitch style pattern as follows... Make 1
Cast on 5sts
Row 1 - K1, Inc Kwise, K1, inc Kwise, K1 (7sts)
For Row 2 and every following alternate row, K
Row 3 - K1, Inc Kwise, K1, inc Kwise, K1, inc Kwise, K1 (10sts)
Row 5 - K1, Inc Kwise twice, K4, Inc Kwise twice, K1 (14sts)
Row 7 - K1, K2tog twice, K4, K2tog twice, K1 (10 sts)
Row 9 - K1, K2tog, K1, K2tog, K1, K2tog, K1 (7sts)
Row 11 - Knit
Row 13 - K1, Inc Kwise, K1, inc Kwise, K1, inc Kwise, K1 (10sts)
Row 15 - K1, Inc Kwise, K6, inc Kwise, K1 (12sts)
Row 17 - K1, K2tog, K6, K2tog, K1 (10sts)
Row 19 - K1, K2tog, K1, K2tog, K1, K2tog, K1 (7 sts)
Row 21 - K1, K2tog, K1, K2tog, K 1 (5sts)
Cast off
For smoother stocking-stitch style, pattern as follows... Make 2
Cast on 5sts
Row 1 - K1, Inc Kwise, K1, inc Kwise, K1 (7sts)
For Row 2 and every following alternate row, P
Row 3 - K1, Inc Kwise, K1, inc Kwise, K1, inc Kwise, K1 (10sts)
Row 5 - K1, Inc Kwise twice, K4, Inc Kwise twice, K1 (14sts)
Row 7 - K1, K2tog twice, K4, K2tog twice, K1 (10sts)
Row 9 - K1, K2tog, K1, K2tog, K1, K2tog, K1 (7sts)
Row 11 - K1, Inc Kwise, K1, inc Kwise, K1, inc Kwise, K1 (10sts)
Row 13 - K1, Inc Kwise, K6, inc Kwise, K1 (12sts)
Row 15 - K1, K2tog, K6, K2tog, K1 (10sts)
Row 17 - K1, K2tog, K1, K2tog, K1, K2tog, K1 (7sts)
Row 19 - K1, K2tog, K1, K2tog, K1 (5sts)
Cast off
Leaf

Make 1
Time - 15 Minutes Each
Size 3 cm x 6 cm
Needles 3.25 mm
Yarn Light green
Cast on 6sts
G-st 6 rows
Inc Kwise, K4, Inc Kwise (8sts)
G-st 3 rows
K2tog, K4, K2tog (6sts)
K 1 row
K2tog, K2, K2tog (4sts)
G-st 2 rows
Inc Kwise, K2, Inc Kwise (6sts)
G-st 3 rows
K2tog, K2, K2tog (4sts)
K 1 row
K2tog twice
K2tog and fasten off
Traditional Style - Centre Piece

Make 1
Time - 5 Minutes Each
Size 1 cm x 1 cm
Needles 3.25 mm
Yarn Black
Cast on 2sts
Inc Kwise into both sts (4sts)
P 1 row
K2tog twice
P2tog and fasten off
Stem

Make 1
Time - 5 Minutes Each
Size 5cm
Needles 3.25 mm
Yarn Bright Green
Use a single length of yarn, or for a thicker stem, work two lengths of yarn together
Finger knit a length of approximately 5cm.
Wavy Edge Poppy

Make 1
Time - 30 Minutes Each
Size 11 cm x 3 cm
Needles 3.25 mm
Yarn Red
Cast on 27sts
Beginning with a P row st-st 3 rows
Next row K1, (yrn, K2tog) to end
Beginning with a P row st-st 3 rows
* Next row (K1,K2tog) to end (18sts)
P 1 row
Break off red yarn and join on black to form poppy centre
Next row K2tog to end (9sts)
P 1 row
B&t tightly
If you have a bit more time and want to make a larger version of the Wavy Edge Poppy, begin with the following larger cast on edge.
Cast on 45sts
Beginning with a P row st-st 3 rows
Next row K1, (yrn, K2tog) to end
Beginning with a P row st-st 3 rows
Next row (K3, K2tog) to end (36sts)
P 1 row
Next row (K2, K2tog) to end (27sts)
P 1 row
Next row (K1, K2tog) to end (18sts)
P 1 row
Break off red yarn and join on black to form poppy centre
Next row K2tog to end (9sts)
P 1 row
B&t tightly
Floppy Poppy

If you don't fancy the 'yrn' stitching, or fancy a quicker version, try this floppy poppy variation.
Make 1
Time - 30 Minutes Each
Size 10 cm diameter
Needles 3.25 mm
Yarn Red
Cast on 45sts
Beginning with a K row st-st 4 rows
Next row (K3, K2tog) to end (36sts)
P 1 row
Next row (K2, K2tog) to end (27sts)
P 1 row
Next row (K1, K2tog) to end (18sts)
P 1 row
Break off red yarn and join on black to form poppy centre
Next row K2tog to end (9sts)
P 1 row
B&t tightly
Piece it Together...
Sewing up time - Total of 15-20 Minutes


Traditional Style
Centre - Pin the knitted centre piece to the centre of the poppy main piece, and sew into place. Fasten off loose ends.
Main Pieces - For the st-st traditional style, place your two pieces together, with right side of st-st on the outside. Sew across the cast on and cast off edges, and row ends.
Leaf - Turning your poppy main piece over, and pin the leaf to the centre of the back. Sew in place, and either fasten off loose ends or leave a length to be able to sew on the hairband or pin badge if desired.


Wavy Edge Poppy
Continue from ‘B&T’ (pulling up tightly), and begin to oversew row ends. Working from the right (knit) side of st-st in mattress stitch will leave a nice neat finish. Continue to work from the centre of the poppy to the outside edge.
Fold over the cast-on edge towards the purl side of st-st and pin into place to form the wavy edge.
Oversew this cast-on edge in place, and fasten off all loose ends.
Pin leaf to the centre at the back of your poppy and then sew into place. Fasten off this loose end or leave long and proceed to sew on a hairband or pin badge, if desired, before fastening off.


Floppy Poppy
Similar to the Wavy Edge Poppy above, continue from ‘B&T’ (pulling up tightly), and begin to oversew row ends. Working from the right (knit) side of st-st in mattress stitch will leave a nice neat finish. Continue to work from the centre of the poppy to the outside edge. Fasten off loose ends.
I feel that this particular style of poppy looks better without a leaf, but if desired, you may pin a leaf to the back of your poppy and then sew into place. Fasten off this loose end or leave long and proceed to sew on a hairband or pin badge, if desired, before fastening off.
For all poppies, ensure any pins are all removed when complete.

Making a Hairband
Sew the hairband so it lies horizontally across the back of the poppy. This will allow the poppy to rest in the upright position in the hair.
Oversew several times to give it strength and longevity. Ensure you sew the band into the main piece as well as the leaf, so that the leaf itself doesn't pull off with repeated use.

Make it Different...
As well as trying out the different styles above, you may wish to use larger needles to make them a bit bigger without adding any extra time. When using st-st you may also wish to use the purl side as the front. It makes a nice pattern for the centre piece.
If not knitting your poppy for remembrance day, try one in a different colour! Start your own little floral collection - as well as a few different poppies, you can knit some other flowers to go alongside it such as the daisy, fuchsia, primrose, or daffodil. Bring the outdoors inside and keep some of those summer memories going!


Behind the Scenes!
These patterns are all made up as I go along, learning from mistakes along the way. Every time I create a new pattern, I record it in the Updates part of this site (effectively my blog…) There is a story behind each creation, and this can help give you some more ideas and encouragement.
All done?
Feel free to share your successes or any other tips or suggestions by contacting me. If it's all gone swimmingly and you're ready for your next challenge, have a look at what to try next!
